mbeva
mbeva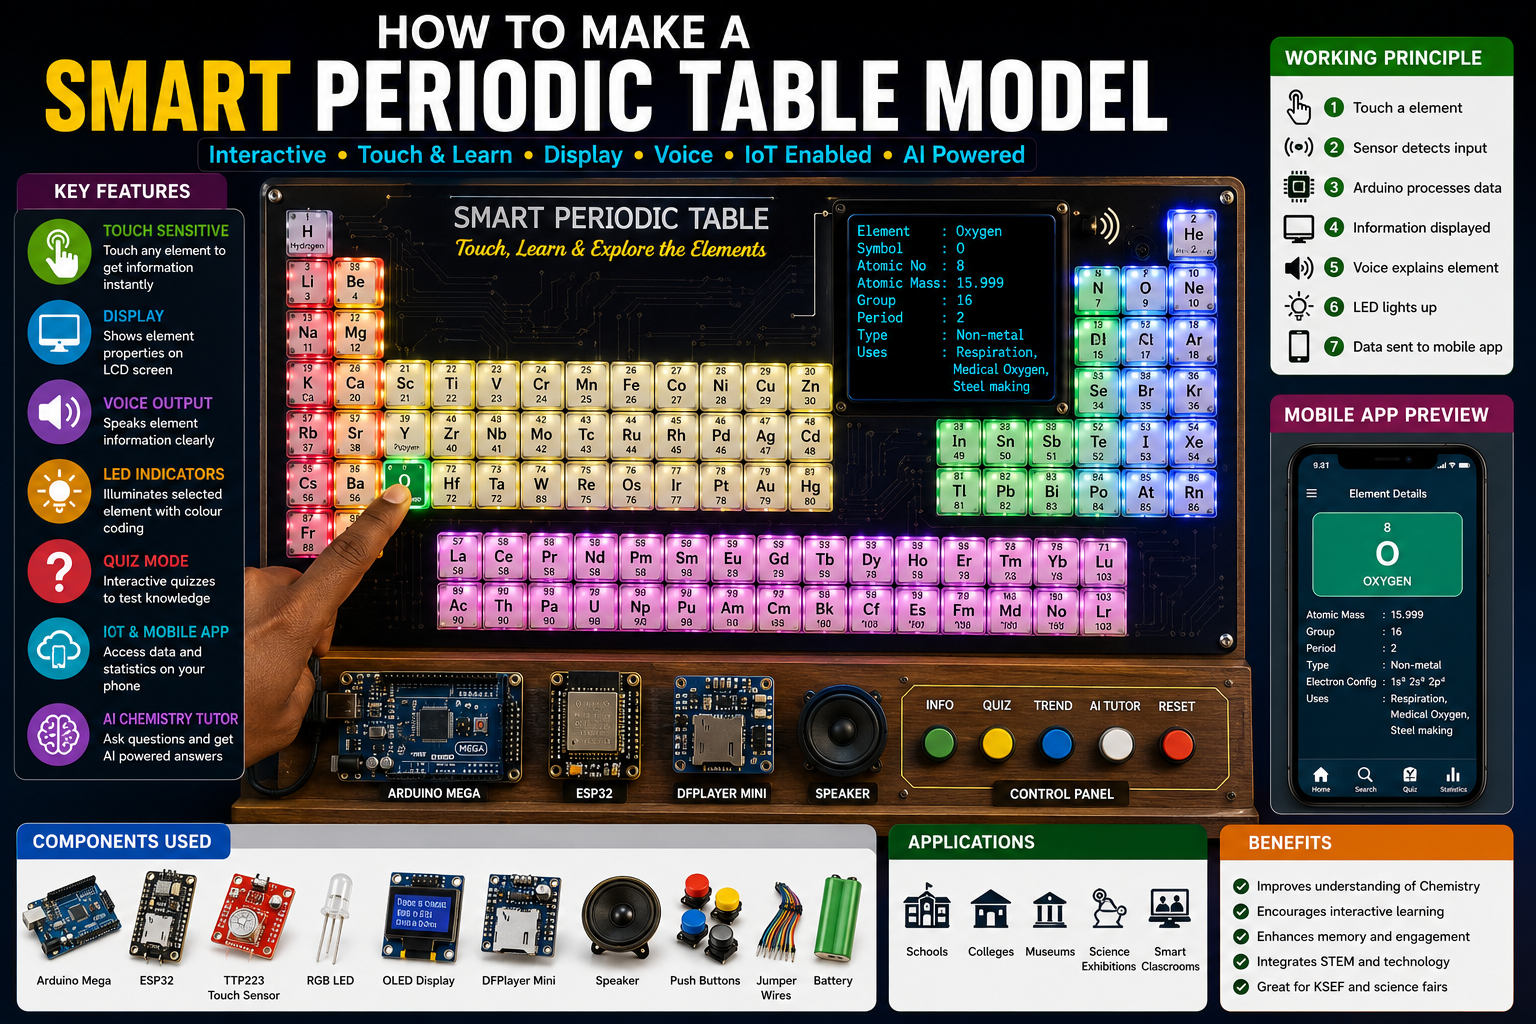
Meta Title: How to Make a Smart Periodic Table Model Using Arduino, ESP32, LEDs and IoT
Meta Description: Learn how to make a Smart Periodic Table Model using Arduino and ESP32. Includes circuit diagrams, components, block diagrams, working principles, flowcharts, and real project apply
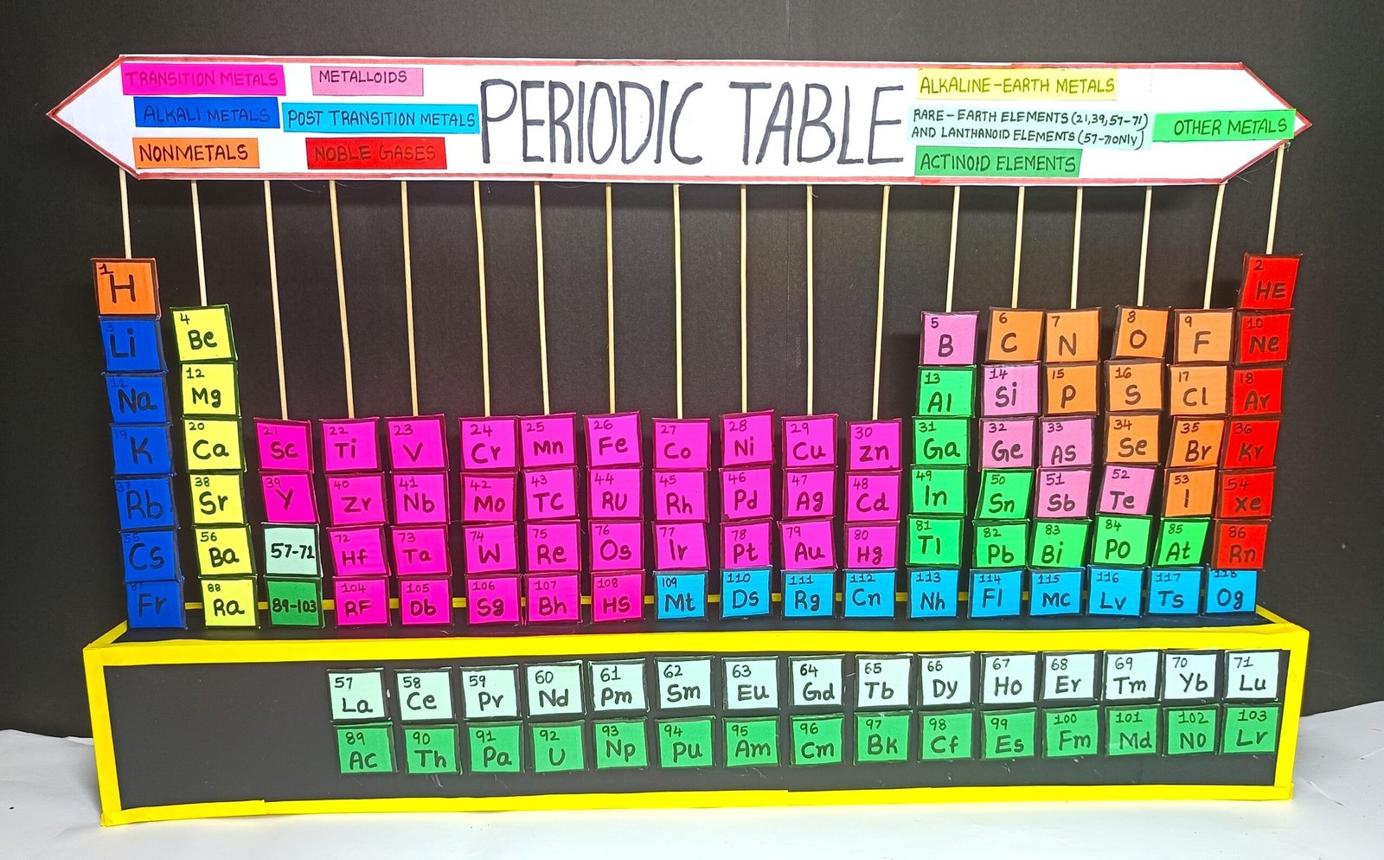
The periodic table is one of the most important tools in chemistry education. However, traditional printed periodic tables are static and often make learning difficult for students.
A Smart Periodic Table Model transforms chemistry learning into an interactive experience. When a student touches an element, the system automatically displays its properties, illuminates LEDs, plays voice explanations, and can even send information to a mobile application.
This project combines Chemistry, ICT, Artificial Intelligence, Engineering, and IoT technologies, making it an excellent project .
Quick Answer: Smart Periodic Table Wiring Diagram
| Component | Pin | Arduino Mega |
|---|---|---|
| TTP223 Touch Sensors | Signal | Digital Pins |
| OLED Display SDA | SDA | Pin 20 |
| OLED Display SCL | SCL | Pin 21 |
| DFPlayer Mini TX | TX | Pin 10 |
| DFPlayer Mini RX | RX | Pin 11 |
| RGB LEDs | Signal | PWM Pins |
| ESP32 Module | TX/RX | Serial Port |
System Workflow
Student Touches Element → Sensor Detects → Arduino Processes → LCD Displays Information → LED Illuminates → Voice Output → Mobile App Update


4
Why Build a Smart Periodic Table Model?
Students often face challenges in:
- Memorizing elements
- Understanding periodic trends
- Learning element uses
- Connecting chemistry concepts to real life
This project helps students learn chemistry interactively.
Objectives of the Project
- Make chemistry learning interactive.
- Display information automatically.
- Improve understanding of periodic trends.
- Integrate chemistry with ICT and engineering.
- Promote STEM education.
Bill of Materials (BOM)
| Component | Quantity | Purpose |
|---|---|---|
| Arduino Mega | 1 | Main controller |
| ESP32 Module | 1 | IoT connectivity |
| RGB LEDs | 118 | Element indication |
| Touch Sensors | 118 | User input |
| OLED Display | 1 | Display information |
| DFPlayer Mini | 1 | Voice output |
| Speaker | 1 | Audio explanations |
| Push Buttons | 5 | Control functions |
| Acrylic Sheet | 1 | Model construction |
| Rechargeable Battery | 1 | Power supply |
| Jumper Wires | Many | Connections |
Estimated Cost
| Item | Approximate Cost |
|---|---|
| Arduino Mega | $12 |
| ESP32 | $8 |
| LEDs | $10 |
| Sensors | $15 |
| Display | $5 |
| Miscellaneous | $20 |
Estimated Total Cost: $60–70
Components Overview


4
Key Features
✅ Touch-sensitive periodic table
✅ Automatic display of properties
✅ Voice explanations
✅ LED illumination
✅ Quiz mode
✅ Mobile application integration
✅ AI chemistry tutor
Model Design
The model consists of:
Upper Section
- Printed periodic table
- Embedded LEDs
- Touch sensors
Middle Section
- OLED display
- Speaker
- Control buttons
Lower Section
- Arduino Mega
- ESP32
- Battery system


4
Block Diagram
Touch Sensors
       ↓
Arduino Mega
       ↓
OLED Display
       ↓
Voice Module
       ↓
RGB LEDs
       ↓
ESP32 IoT Dashboard


Circuit Connections
OLED Display
- SDA → Pin 20
- SCL → Pin 21
DFPlayer Mini
- TX → Pin 10
- RX → Pin 11
LEDs
Connect through multiplexers or shift registers.
Touch Sensors
Each element has one sensor input.


Step-by-Step Guide: How to Make a Smart Periodic Table Model
Step 1: Construct the Board
Use:
- Acrylic sheet
- Wooden board
- PVC board
Print and mount the periodic table.
Step 2: Install LEDs
Place LEDs under each element.
Use different colours for classifications.
Step 3: Install Touch Sensors
Attach sensors beneath each element.
Step 4: Connect Electronics
Install:
- Arduino
- ESP32
- Display
- Speaker
- Battery
Step 5: Upload Program
The program should:
- Identify selected element.
- Display information.
- Activate voice output.
- Illuminate LEDs.
Working Principle
When a student touches an element:
Example:
Student touches Oxygen (O)
The system performs the following:
- Detects touch input.
- Arduino identifies Oxygen.
- OLED displays properties.
- LED illuminates.
- Speaker provides explanation.
- Mobile app receives information.
Example display:
Element: Oxygen
Atomic Number: 8
Atomic Mass: 15.999
Group: 16
Uses:
Respiration
Medical oxygen
Steel manufacturing
System Flowchart
START
    ↓
Wait for User Input
    ↓
Element Selected?
    ↓
YES
    ↓
Display Properties
    ↓
Illuminate LEDs
    ↓
Activate Voice Output
    ↓
Send Information to App
    ↓
Repeat


4
Innovative Features
1. Quiz Mode
Example:
Find the element with atomic number 17.
Student selects:
Chlorine
System awards marks.
2. Periodic Trends Visualization
Display:
- Atomic radius
- Electronegativity
- Ionization energy
using LED animations.
3. Voice Assistant
Students ask:
Tell me about Carbon.
System explains automatically.
4. AI Chemistry Tutor
Can answer:
- Why is Sodium reactive?
- Why are noble gases stable?
5. IoT Dashboard
Students can remotely access:
- Element properties
- Quizzes
- Learning statistics
Applications
This project can be used in:
- Schools
- Universities
- Museums
- Science centres
- STEM laboratories
- Smart classrooms
Advantages
✔ Interactive learning
✔ Improves understanding
✔ Attractive visual display
✔ Integrates chemistry and ICT
✔ Supports self-learning
Limitations
- Large number of sensors required.
- Complex wiring.
- Higher cost than traditional models.
Future Improvements
You can improve this project by adding:
Augmented Reality (AR)
Display 3D atomic structures.
Artificial Intelligence
Personalized chemistry tutoring.
Holographic Display
Project periodic trends in 3D.
Cloud Database
Store student learning records.
How to Fix Common Arduino Upload Errors
Error: Arduino Not Uploading
Solutions
- Verify COM port.
- Replace USB cable.
- Install drivers.
Error: LEDs Not Working
Solutions
- Check polarity.
- Verify resistors.
Error: Display Not Showing Data
Solutions
- Verify SDA/SCL wiring.
- Check I2C address.
Error: Touch Sensors Not Responding
Solutions
- Check sensitivity settings.
- Verify connections.
Real Project Prototype


Featured Images Required for Blog
1. Components Image
- Arduino Mega
- ESP32
- Touch Sensors
- RGB LEDs
- OLED Display
- DFPlayer Mini
2. Features Illustration
- Interactive learning
- Voice assistant
- Mobile app
- Quiz mode
3. Block Diagram
Sensors → Arduino → Display → Voice → IoT
4. Working Principle Diagram
Student Touch → Processing → Display → Voice
5. Circuit Diagram
Complete Arduino wiring layout.
6. Flowchart
System operation process.
7. Real Prototype Image
Fully assembled Smart Periodic Table Model.
Final Thoughts
Learning how to make a Smart Periodic Table Model is one of the most innovative educational STEM projects.
By combining Chemistry, Arduino, ESP32, Artificial Intelligence, and IoT, students can transform the traditional periodic table into a modern interactive learning system.