How to Build a Fingerprint Door Lock System Using Arduino

Fingerprint-based security systems are becoming increasingly popular in schools, homes, offices, and laboratories because they provide higher security than traditional keys and passwords. In this project, you will learn how to build a smart door lock that opens only when an authorized fingerprint is detected.

Step 1: Gather the Required Components

Before starting, collect the following materials:

  • Arduino Uno
  • R307 Fingerprint Sensor
  • Servo Motor (SG90)
  • Breadboard
  • Jumper Wires
  • Green LED
  • Red LED
  • Buzzer
  • 220Ω Resistors
  • USB Cable
  • 5V Power Supply

Components Overview

https://images.openai.com/static-rsc-4/L7gA9Zbln7e5KkLkCCFqyhBui9CYYKy-LlAsY45cMeqpuDVB2ROsAaIqBaLd92GuS6PFheXhlP0x4H6FqN7NROr1gENRvpTjWIqmj8_dRb9B_YgblsNcEkJvVTtLuwK16JbWjaUUkGvDiq1Z0kD1z6NZaHe3NKgkSyYFAF09YJComudrxgSNO1ggNHpTpwGp?purpose=fullsize
https://images.openai.com/static-rsc-4/G9AfvOYMSHi0ndOVc5eoca-dI9zLF8AulGMMSJb-dNTCReQg3hQ8uQC2C9dY7dX_67P1Jud94lYsLR2DCJbgDOvnPd5jsTdMUoVYPU4Kl9CpN2UScFG6gZEsHoD3U9xnokLz-dub9YglM96TqGm98_ypEXICwsehf8QvkULjW2sp5q7YV0nJm1n3KnoURRWY?purpose=fullsize
https://images.openai.com/static-rsc-4/KSNVIV-8FEZdgdJtUEgJgAxk9GjYQFBEiotENLpslYE4ICnttz0TSaqvO4b7blRG8ibRyL3VrElNJ_5-Wu6WoSJ_lG3xwOfW3xv6F9cgyP2vNfQgi8lQTbrAKX44UGYE59v4gr62ybKzkqQ8xtK_1Ga4e-r95QH3McJw1QAAiMox0LqpfxiUGxh0UySs2v-l?purpose=fullsize

4

The fingerprint sensor will identify authorized users, while the servo motor acts as the lock mechanism.


Step 2: Understand the System Operation

The system works as follows:

  1. User places a finger on the sensor.
  2. Sensor scans and compares the fingerprint.
  3. Arduino processes the data.
  4. If a match is found, the door unlocks.
  5. If no match is found, the alarm sounds.
Fingerprint


Fingerprint Sensor


Arduino Uno

┌───┴────┐
▼ ▼
Match No Match
│ │
▼ ▼
Unlock Alarm
Door Sounds

Step 3: Construct the Door Model

Build a small demonstration door using:

  • Plywood
  • Acrylic sheet
  • Cardboard
  • MDF board

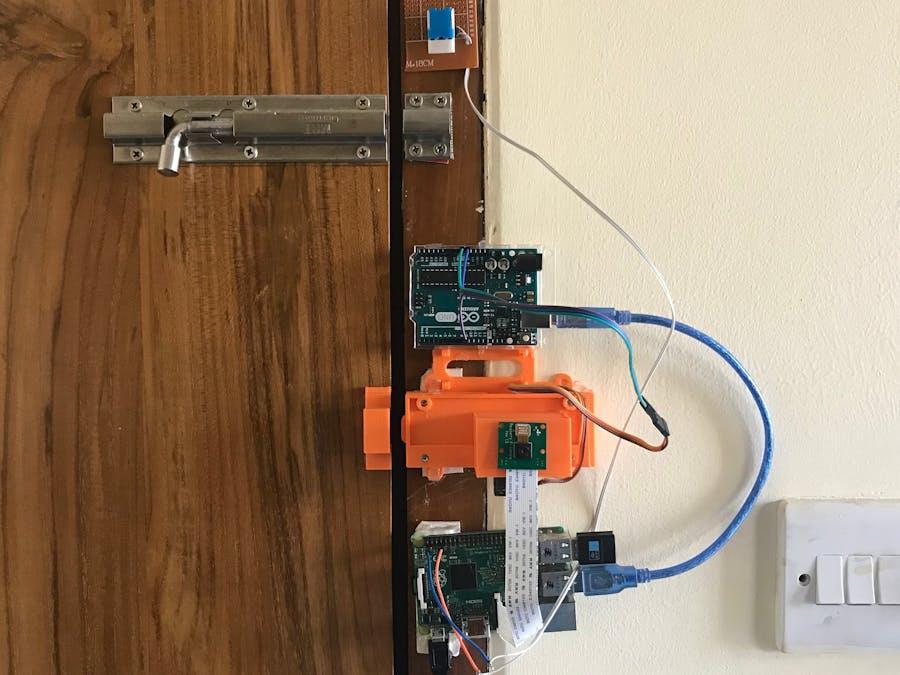
Mount the servo motor behind the door so it can move a locking arm.

Door Prototype Example

https://images.openai.com/static-rsc-4/_rRNAPCblf-laGygtbU77HfJe0Qke1GyfCB_sQh4sIQUVmUuCzo_76FiFUuZ384m9T6D7XXMnJGLjgibVuCq5MkMAhqrOOdQzqkyajyO8PtezvXgS1DYSntcB64dLr3tueRcAk2aQBFQqZikKZGZqtUkW75epb6MiVX2-6sVEgPjaZA1i8j4jm5qH_q4UrXF?purpose=fullsize
https://images.openai.com/static-rsc-4/WHoej2jDAEozJixwMvdcRkZXQgt2gAtrPynGYOIczEkWrpyGdQSBOX-HxV-itiINu0g-UqAOmZtDFHAgDcnmKkQb31X7u1V9eTJ9xLWoVS2rhoQijMamaf530Pmi-wL93jdEISjMgFFg16KcqK17db8KvcP-Lr5ctZlGjXJW1PV703IEIVD4fld4_NyuPuGE?purpose=fullsize
https://images.openai.com/static-rsc-4/pvAPsLqQC6iR_U8Dw5PGu1cDuK7fJlugVr01BbK5aYKoUY1SPLCkiYhPeB3p4dEOgbOhwwHszD7AYkqVNi2nyFP8jpJEoPDiARgawRjL6oNi1xWeYLUc3I9Cd27OnzcUqO7KgfmcX4bflu8vMPwBD8OsFQMgIGpQj_-wn6VF5bSoCiuTKLC4JcflL4lX5-zo?purpose=fullsize

7


Step 4: Connect the Fingerprint Sensor

Wire the sensor to the Arduino.

Fingerprint SensorArduino
VCC5V
GNDGND
TXD2
RXD3

The sensor will store and recognize fingerprints.


Step 5: Connect the Servo Motor

Servo WireArduino
Red5V
BrownGND
OrangeD9

The servo rotates when a valid fingerprint is detected.


Step 6: Add Security Indicators

Install:

  • Green LED = Access Granted
  • Red LED = Access Denied
  • Buzzer = Security Alarm
ComponentArduino Pin
Green LEDD5
Red LEDD7
BuzzerD8

Wiring Arrangement

https://images.openai.com/static-rsc-4/fFNb3_yKsSuyC70dH_pVo0nIDWpd8cHbziZ9modcYmnANceTwb_pD67gfFUEQGQ-uBtECTe0KYYyOXMca_5zxxIcJ-M0Tdd3eTrbwKMd_RCLNeok0ywXj7CQCZyao_09m3egb8DX7g7-TDQNENfi_2FIGx-PLxaCURVqW_kJ0h55ZvdayzPUUw59mIgaKg9o?purpose=fullsize
https://images.openai.com/static-rsc-4/QEfRZYXlE9s0h7sP1qX6VWhofgpDhcTe0dcg2dvr2LyiAkPv8yrdySCz_rWrnM19q-v-zLKCDXZQVctTgvtTs4ZjA5Hh5IfIHXLE5WLYwSgg4I1C8HoLH8B0XeUM-cWkb8swOkRkSQmYKVLm9TOM29hlnMjNP-96I1ymiS4t6-OhtGF3eq4DQlONi6amfANh?purpose=fullsize
https://images.openai.com/static-rsc-4/YlZiMHy4_J7aHvXIk-hrSBg3kL27d_3h8Uvryl-AVqjouNlTqHM5_Z4Ck5h2tXh9Paqk3hBhxRajAj0DVy1pdLQR09zeARHEZ2uiOXPq3jBXcT9xvbg8DacQ5moKa1HpL7DtX9-T1PdRb1ysy6XVRoiQeRolDecGHJyaOiuAdzW9SbvvVI70k1JTik8jTRez?purpose=fullsize

8


Step 7: Program the Arduino

Upload the fingerprint lock program using Arduino IDE.

The program should:

  • Read fingerprint data
  • Compare stored fingerprints
  • Unlock when matched
  • Trigger alarm when unmatched

After uploading, test several fingerprints.


Step 8: Enroll Fingerprints

Using the fingerprint library software:

  1. Open Arduino IDE.
  2. Upload the enrollment sketch.
  3. Scan your finger twice.
  4. Save the fingerprint ID.
  5. Repeat for additional users.

The sensor can store multiple fingerprints.


Step 9: Test the System

Authorized User

  • Green LED turns ON.
  • Servo rotates.
  • Door unlocks.

Unauthorized User

  • Red LED turns ON.
  • Buzzer sounds.
  • Door remains locked.

Testing the Prototype

https://images.openai.com/static-rsc-4/g2XX1Lx2_Af_SVpBY00_y3TwGhd2QSSGRoDHfUZy38BB7Gmtc0U5q-57I6E1hdF1RjaWR5euIs5vC-oMtrVLkPgp_96PzkqBbblLVQ-ERdOtbEi1LCdLFwK0IqU4auvmWvQ93YHNcl4BctZosdLkXzDbyJEvHhI71-nM8nNU_ptRkaq8kxoj53apBi4HCsBi?purpose=fullsize
https://images.openai.com/static-rsc-4/IPnnVHhvwVo8XpnQngQYkOkT_4bVcIjaO5s4P2f-tF_HnLNmXbnySJYoqgveQUxl422lh11T7mWxzONo2AE-1g8Qto5etXR2dBI8WdZ1yv5dVixYe2Tz7VhUJp3Taf4zU-MDikyOSc_8rvYK37YXs-mwZlPCZxl_i-OUAAC69aRaqCbRvNMWsDgGP0tpzcyN?purpose=fullsize

6


Step 10: Collect Data

Record your observations.

Test NumberFingerprint StatusAccess Granted
1RegisteredYes
2RegisteredYes
3UnknownNo
4UnknownNo

Step 11: Improve the Project

To make the project stand out from ordinary fingerprint locks, add:

GSM Security Alert

Send SMS notifications whenever unauthorized access is attempted.

Attendance Monitoring

Record who enters and at what time.

Solar Backup

Keep the system operating during power outages.

Mobile App

Monitor access remotely using a smartphone.

Face Recognition

Add a camera for dual authentication.

Cloud Database

Store access logs online.

Advanced Version Concept

https://images.openai.com/static-rsc-4/wgt-w5caGwYcE0fUJLBE9RzCx-ETZQ5VnQpR5fTdJtmm7DELZDewCX4bZXc6WHIqfoyPw6ASBoRz1J_-UXOwtEwnrb1SKQMfAlFXqughuG_LRzKMvJiPFw2wUdfMIejYtFhHsxqaHcrsYZm02huYMUZ-z8nQyt_dC76Y4STJTIxagcbpGTKBSqQOdUgfnBAO?purpose=fullsize
https://images.openai.com/static-rsc-4/fkUwtVhTKAiEGOpl30hfNPke3fV1f6TakBJ58IiZVwqYEnluVUwZPX9QjnpU34464tuj5Lz-w6wjkqzA7YFm058TmwgrmguDR52_7ytUvZDHV9yiEUqn-KLszxjHAsH5-tlVLoyYvGtIk78dk6PZeU5xcIzBHPcssR0W6jGVtXhiYCGeYlQTOq6j8pyUZYeT?purpose=fullsize
https://images.openai.com/static-rsc-4/zuUAR_Tlc5ab0f372Dpw9PTcv7RGXPzUwt2FtbJeJx1ODCwqzTCgs67E-lYP-itJCyWMe5zA_YtaJwNTyj80PbCpDQzcPBeXMphrfKYDdpuEYHDMa0aE07y2X39kEOze_878DYV6GT6NEOPY9hf_-p8-J1-uIORnkwC2VdaHl43Ef_2OM_-SahYrPyVFKcm_?purpose=fullsize

4


Expected Results

The completed system should:

✔ Identify authorized users accurately.

✔ Unlock the door automatically.

✔ Prevent unauthorized access.

✔ Provide visual and audio alerts.

✔ Demonstrate practical application of biometrics and automation.

  • mbeva

    Dominic Mbeva is a science teacher, experienced researcher, innovator, and creative technologist with expertise in STEM education, digital media, and scientific research. As a Kenya Science and Engineering Fair (KSEF) advisor and projects manager, he mentors young scientists, guiding them in developing award-winning innovations. He is also an IC Technorat, leading advancements in science and technology. Beyond education, Dominic is a skilled photographer and video editor, using visual storytelling to make science more engaging. His philosophy, “If you take care of minutes, hours will take care of themselves,” reflects his belief in consistent effort, strategic thinking, and innovation to drive success in both research and creativity.

    Related Posts

    The Dawn of the “Fuel-Less” Workhorse—Solar-Powered Heavy Machinery and Industrial Vehicles

    The global conversation about clean energy has long revolved around electric passenger cars. Yet the real pressure point in the world economy has never been the family sedan—it has been…

    Read more

    THERMOELECTRIC GENERATOR USING LANDFILL HEAT

    ABSTRACT The purpose of this project was to design and develop a thermoelectric generator system capable of converting landfill heat into usable electrical energy. The study aimed to demonstrate that…

    Read more

    Leave a Reply

    Your email address will not be published. Required fields are marked *