
Making Plastic Toys at Home Using DIY Injection Molding
Introduction
Injection molding is a widely used manufacturing process in which molten plastic is injected into a mold to create a specific shape. This technique is used to produce a variety of plastic products, including toys, containers, and machine parts. While industrial-scale injection molding requires expensive machinery, a DIY version can be developed at home using simple tools and materials.
This project explores how to create plastic toys at home using DIY injection molding, making it an affordable and sustainable alternative to buying mass-produced toys. By experimenting with different types of plastic, including recycled materials, it is possible to produce high-quality toys while also reducing plastic waste.
Problem Statement
Commercially available plastic toys are often expensive, mass-produced, and contribute to environmental pollution due to plastic waste. Additionally, many toys are not customizable, limiting creativity and personalization. This project aims to develop a low-cost DIY injection molding process that allows individuals to make plastic toys at home. By incorporating recycled plastic, this project also seeks to promote sustainability and environmental conservation.
Objectives
The main objective of this project is to develop a DIY injection molding technique for making plastic toys at home. This includes:
- Designing and creating simple molds for toy production.
- Developing a method to melt and inject plastic into the molds.
- Testing different types of plastics, including recycled materials, to determine their suitability.
- Evaluating the durability, quality, and safety of the produced toys.
Hypothesis
It is possible to produce durable, well-shaped plastic toys at home using a DIY injection molding process with minimal equipment and recycled materials.
Materials and Equipment
To successfully complete this project, the following materials and tools are required:
- Plastic Pellets or Recycled Plastic: High-Density Polyethylene (HDPE), Polypropylene (PP), or Acrylonitrile Butadiene Styrene (ABS).
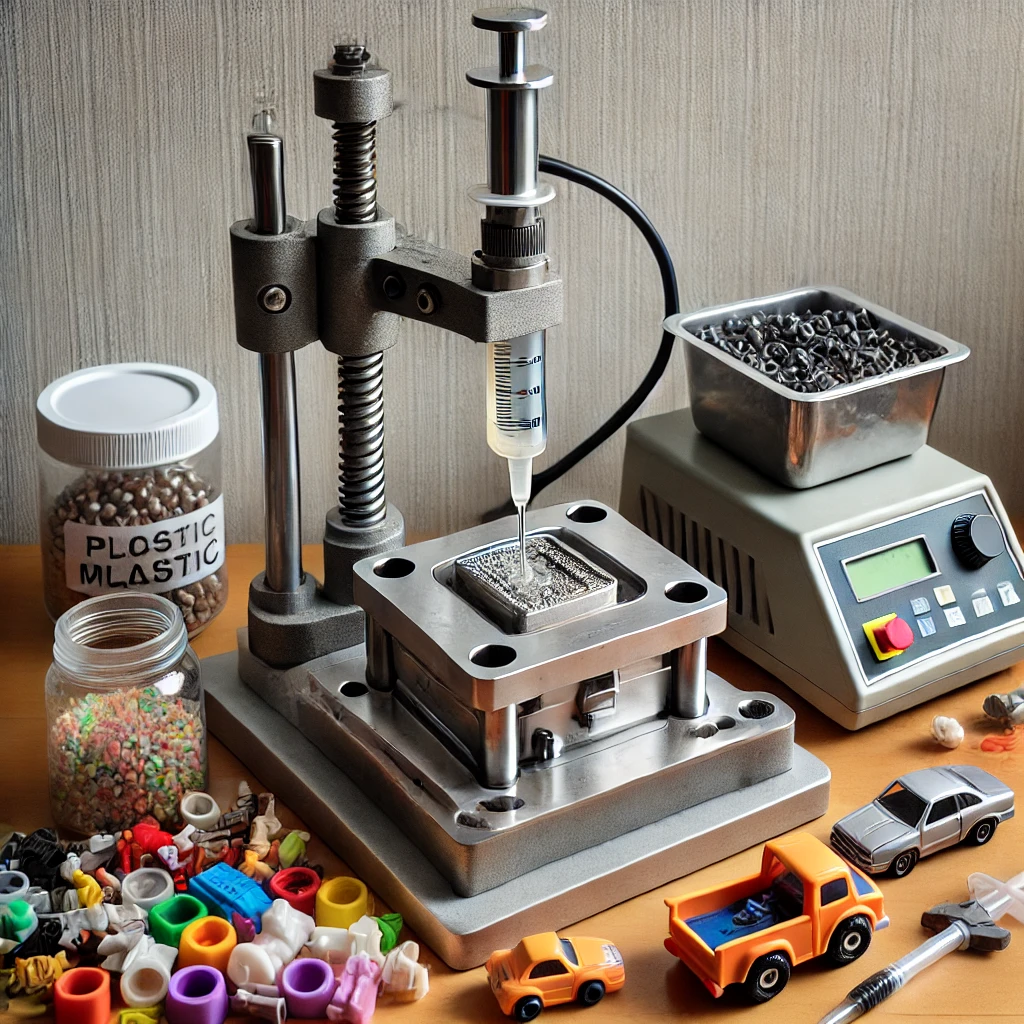
- Molds: Custom-designed molds made from metal, silicone, or 3D-printed resin.
- DIY Injection Molding Machine: A small hand-operated injector or a homemade syringe-style injector.
- Heat Source: An electric heating coil, hot plate, or oven for melting plastic.
- Clamps: To hold the mold firmly during the injection process.
- Safety Gear: Gloves, protective goggles, and a mask to prevent burns and inhalation of fumes.
- Finishing Tools: Sandpaper, a cutter, and paint for refining the final toy product.
Methodology
Step 1: Designing and Preparing the Mold
The mold is a crucial component in injection molding, as it determines the final shape of the toy. The mold can be created using different materials:
- Silicone Molds: Ideal for simple shapes and easy to use for DIY projects.
- Metal Molds: Durable and suitable for multiple uses but require specialized tools for carving.
- 3D-Printed Molds: Can be designed using CAD software and printed using high-heat-resistant materials.
Once the mold is ready, it must be tested to ensure that it has an entry point for plastic (sprue) and proper venting to allow air to escape during the injection process.
Step 2: Preparing the Plastic Material
Plastic pellets or shredded recycled plastic are collected and cleaned thoroughly to remove any contaminants. If using recycled plastic, it must be melted and filtered to remove impurities before use. Adding color pigments at this stage allows customization of the toys.
Step 3: Heating and Injecting the Plastic
The plastic is heated using an electric coil or hot plate until it reaches a molten state. The temperature must be controlled carefully to prevent overheating, which could degrade the plastic. Once molten, the plastic is injected into the mold using a hand-operated injector or a screw press.
The mold must be securely clamped during this process to prevent leaks and ensure the plastic fills all cavities evenly. Proper injection pressure is necessary to achieve a smooth and detailed final product.
Step 4: Cooling and Demolding
After injection, the mold is left to cool, allowing the plastic to harden into its final shape. Cooling time varies depending on the plastic type and mold thickness. Once fully set, the mold is opened carefully, and the toy is removed.
Step 5: Finishing and Quality Testing
The toy is examined for any defects, such as rough edges or excess plastic (flash). These imperfections are trimmed using a cutter or sandpaper. If necessary, additional painting or polishing is done to enhance the toy’s appearance. The final product is tested for durability and flexibility to ensure safety and usability.
Results and Observations
The experiment demonstrated that DIY injection molding is a feasible method for making plastic toys at home. Successfully molded toys retained detailed shapes, and different plastic materials produced varying levels of durability. Recycled plastic proved to be a viable option, though it required thorough cleaning and filtration before use.
Observations included:
- Silicone molds worked well for simple designs but struggled with highly detailed parts.
- Metal and 3D-printed molds provided sharper details and were more durable.
- Injection pressure and cooling time had a direct impact on toy quality.
Conclusion
This project successfully demonstrated that plastic toys can be produced at home using DIY injection molding. By using simple tools and materials, it is possible to create durable, customized toys while also promoting the recycling of plastic waste. This method provides an affordable alternative to store-bought toys and encourages creativity in toy design.
Recommendations
To improve the process and make it more efficient, the following recommendations should be considered:
- Enhance mold design by using precision tools for better detailing.
- Experiment with different plastics to find the most durable and flexible materials for toys.
- Improve the injection system by using a stronger press or automated injection system for better consistency.
- Promote the use of recycled plastic to reduce environmental impact and encourage sustainability.
References
- Engineering Handbooks on Plastic Injection Molding
- Scientific Articles on Plastic Recycling and Manufacturing Techniques
- Online Resources on DIY Injection Molding and Mold Making


